These Easy Homemade Pizza Pockets are warm, cheesy and simple to make. Customize them to suit your own personal tastes! EVERYONE loves them!
They freeze perfectly and are delicious reheated, even in the microwave. Throw together a double batch this weekend and enjoy them for weekday lunches, party snacks or game day munchies.

So, I hear there’s a big game coming up this weekend…. I know some people are interested in football, but in my mind it’s all about the FOOD. And what a great excuse the Super Bowl is to eat a bunch of delicious, maybe not super healthy treats.
That’s the thing about these Homemade Pizza Pockets, though.
There’s nothing unhealthy about them.
They’re really just delicious homemade pizza turned into finger food.
Why You’ll Love This Recipe
This is a SUPER versatile recipe!
These pizza pockets are SO easy to customize to suit any taste.
I’ve made simple pepperoni and cheese a few times in the past for my niece’s school lunches. You can dress them up with peppers, mushrooms, or any other pizza toppings you like.
I’ve also made them with chicken, pesto and mozzarella, kind of like homemade hot pockets and those were delicious too. Ditto with ham and cheese.
Really, any ingredients that would be yummy encased in dough and baked are great options!
They’re perfect for weekday lunches when you’re meal prepping or football games with friends!
Also, if you make your dough ahead of time or use store-bought dough, these come together very quickly!
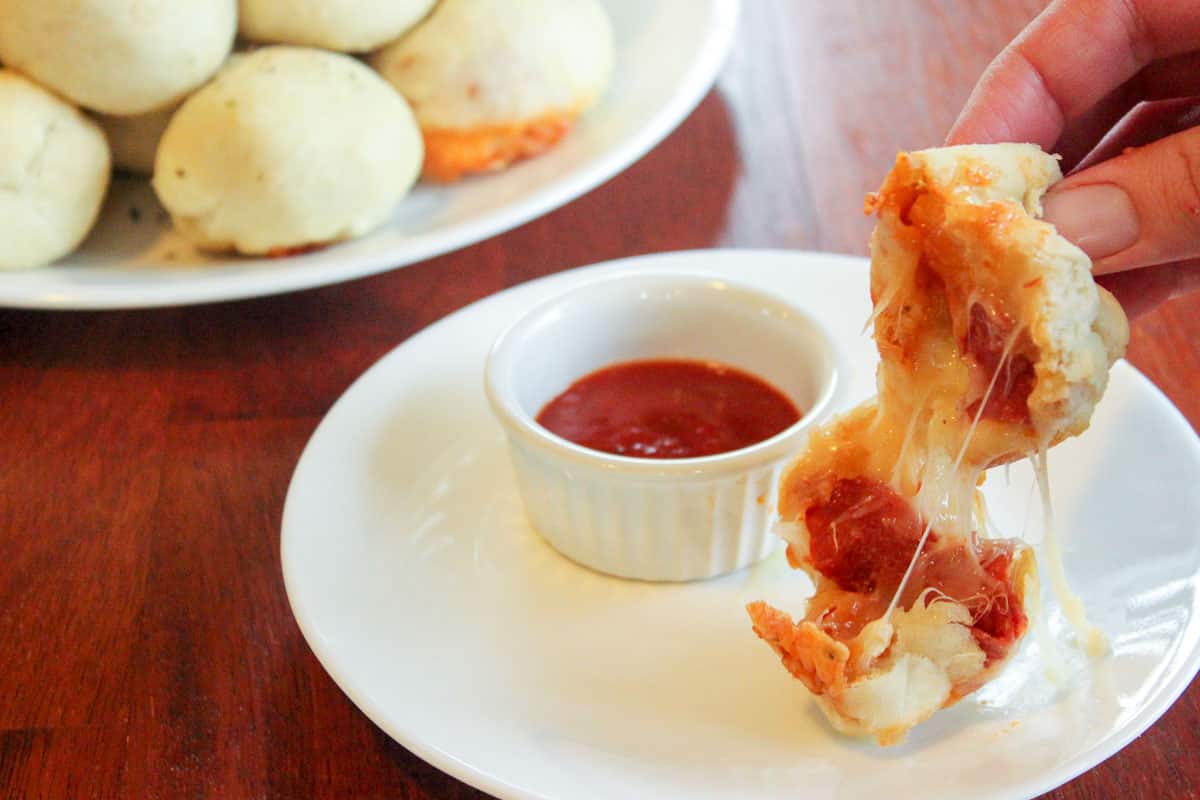
You can EASILY make these vegetarian by leaving out any meat and filling them with veggies and cheese. Really, almost any combination of flavors you like could be stuffed inside pizza dough and enjoyed this way.
>>> If you’re looking for a recipe for fluffy, soft homemade pizza dough, check out ours below: Simple Pizza Dough – Two Ways: Easy and Easier! <<<
PS – you might also find it helpful to check out our posts on Stocking Your Pantry on a Dime , Stocking Your Freezer on a Dime and Stocking your Fridge on a Dime.
These freeze super well. I made some this month for our two year old’s birthday party. Since I didn’t want to have a million things to do at the last minute, I made them a week or two ahead of time.
They thaw perfectly and I think heat up even better in the microwave than any other way (they stay nice and soft this way).
Ingredients/Variations/Substitutions
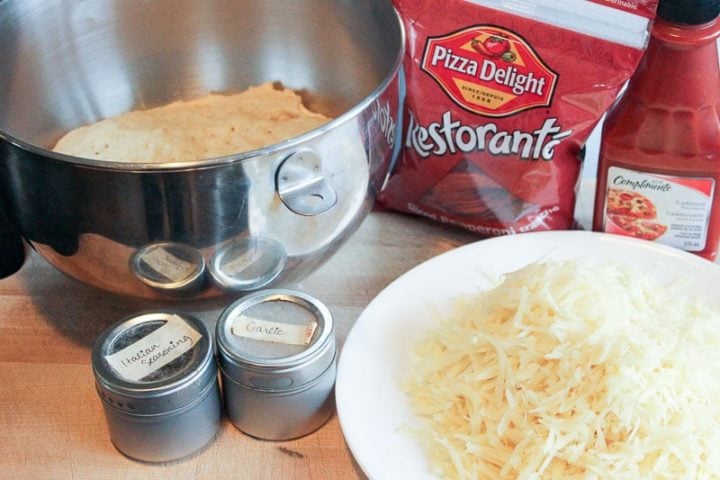
- Pizza Dough – we have a soft, fluffy homemade pizza dough recipe that you can make ahead of time to save MONEY, OR you can use store-bought dough to save TIME.
- Pepperoni and cheese – this is pretty much the most basic filling you can use for these cute little pizza pops, but we have other suggestions too:
Ideas for gourmet pizza pockets –
– broccoli/mushrooms/onions/peppers/mozzarella (vegetarian),
– ham/pineapple/onion/mozzarella (Hawaiian) (blot pineapple dry)
– sausage/onion/bacon/pepper/olive/mozzarella (deluxe pizza)
Ideas for gourmet hot pockets –
– chicken/hot sauce/mozzarella (buffalo chicken)
– alfredo sauce/ham/cheese/broccoli (YUM)
– roast beef/horseradish/swiss (YUM)
– taco meat/sour cream/ hot sauce/cheddar cheese (taco-inspired)
– steak/peppers/garlic butter/provolone (steak sandwich)
- Egg wash – if you want your pizza bites/hot pockets to be dark brown and shiny on the top you can brush an egg wash on before baking (whisk an egg with a tablespoon of water and brush a thin layer on top of the dough). Personally I like them better without it.
Tip: DON’T use the pre-shredded cheese in the bags – it is coated with an anti-clumping agent that stops it from melting very well.
Why it’s Budget-Friendly

Recipe total: $4.87
Cost per pizza pop: $0.20
> This is a great way to use small leftover items like different types of cheese, small amounts of vegetables or deli meats, etc.
> We live in an area where groceries are fairly expensive, but with a little planning and strategy, you can definitely save money.
> Meatless meals are a great way to save money on groceries.
> You only need a small amount of each ingredient to stuff each pizza pop.
> You can make a variety of different kinds of pizza pockets or pizza pops to satisfy a lot of different tastes or moods.
> Pizza dough is very cheap to make, but it’s also usually fairly cheap to buy. So you can decide whether you want to save a little bit of time or money, and plan accordingly.
> You can also make pizza dough a day or two ahead of time and refrigerate the ball of dough until about an hour before you’re ready to use it – then let it warm up on a warm kitchen counter (or freeze for longer storage, but thaw earlier).
> We often save money by buying items in bulk (and waiting for sales). If you have extra of an ingredient and you’re not sure how to use it, check out the How to Use Leftover Ingredients section below!
Step-by-Step Instructions
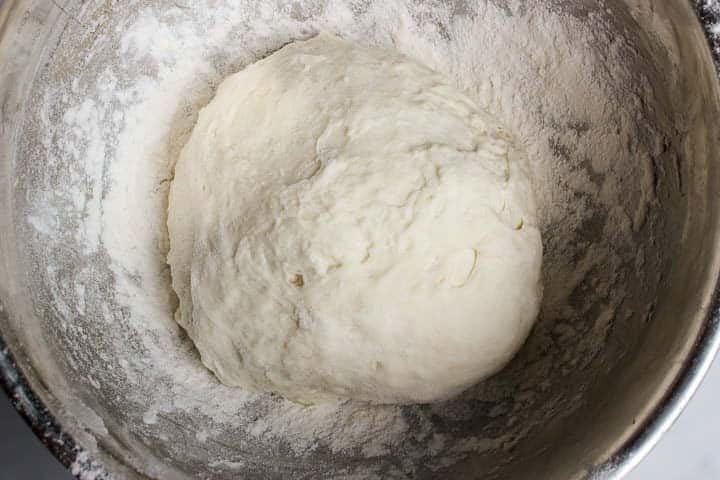
Start by finding yourself some pizza dough. You can either buy it (slightly faster) or make it (slightly cheaper)
We have a great recipe for soft, fluffy dough and you can even make it ahead of time: Simple Pizza Dough – Two Ways: Easy and Easier!
Tip: If you make your dough early, wrap the ball in plastic wrap and store it in a zip top bag in the fridge for a day, or freeze it for longer storage.
If you refrigerate the dough, take it out at least an hour before you start your pizza pops so it can warm up nicely and get fluffier.
If you freeze your dough, you’ll need to thaw it overnight in the fridge and then give it at least an hour at room temperature to warm up.
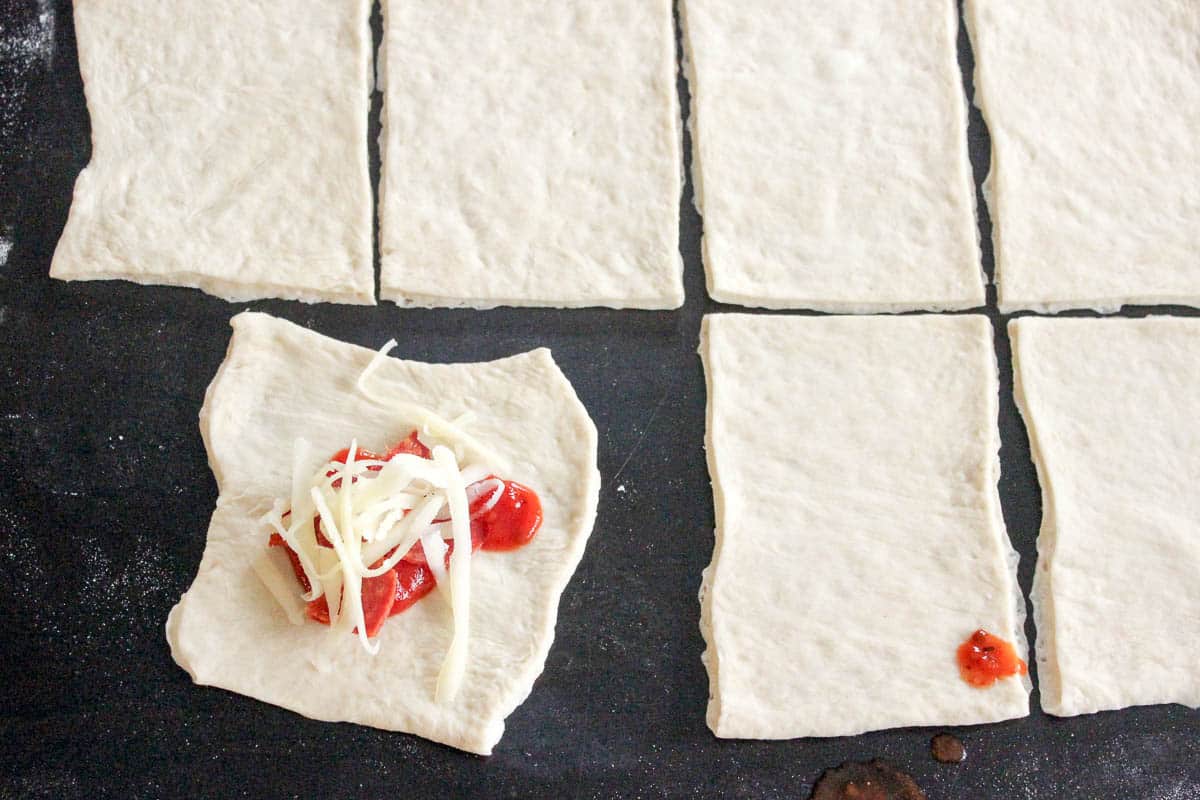
Roll out the dough into a fairly thin, but large square or rectangle and use a sharp knife to cut it into squares.
I was able to make 24 squares with one batch of our dough.
Yes, some of them are more like wonky rectangles. I’m fine with that. 😛
Put your filling in the center of a square.
Tip: Don’t over stuff it because you need a fair amount of dough around it to fold together AND the dough should not be moist from pizza sauce.
Ex: You can cut your pepperoni into quarters and use 2 per pocket.
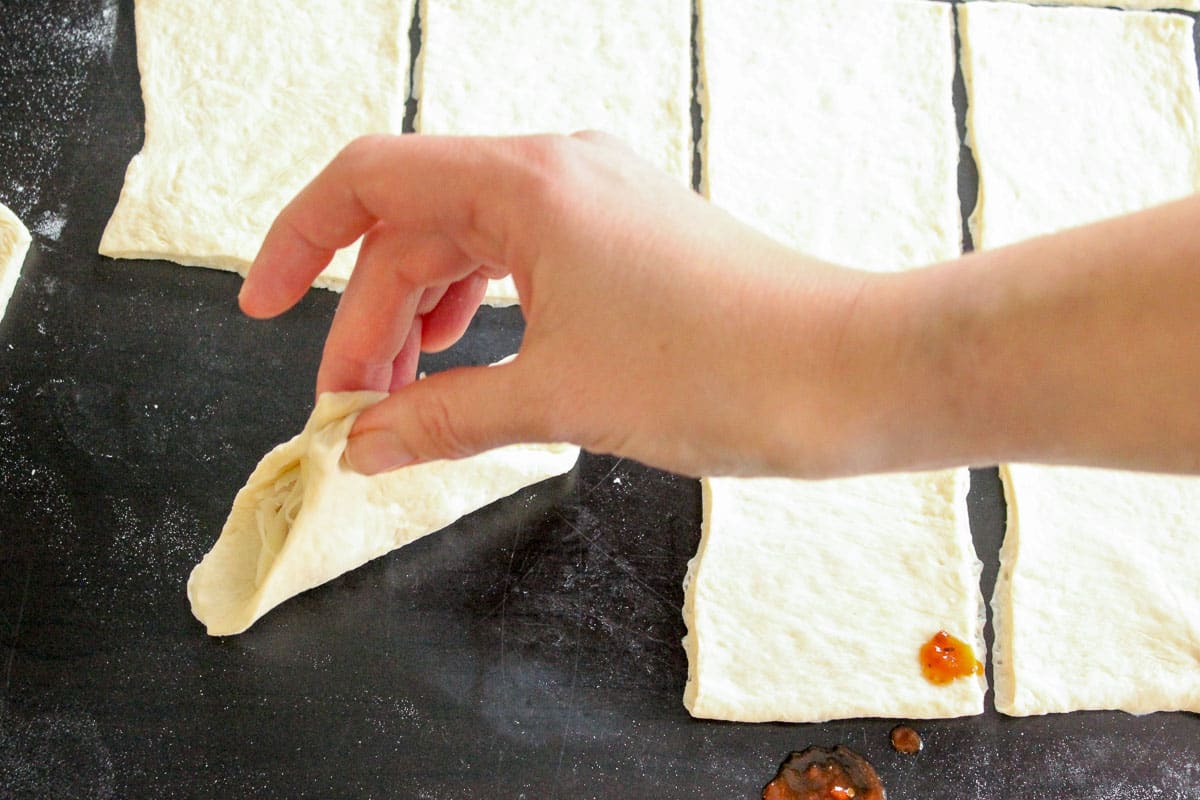
Fold two opposite corners up and pinch them together.
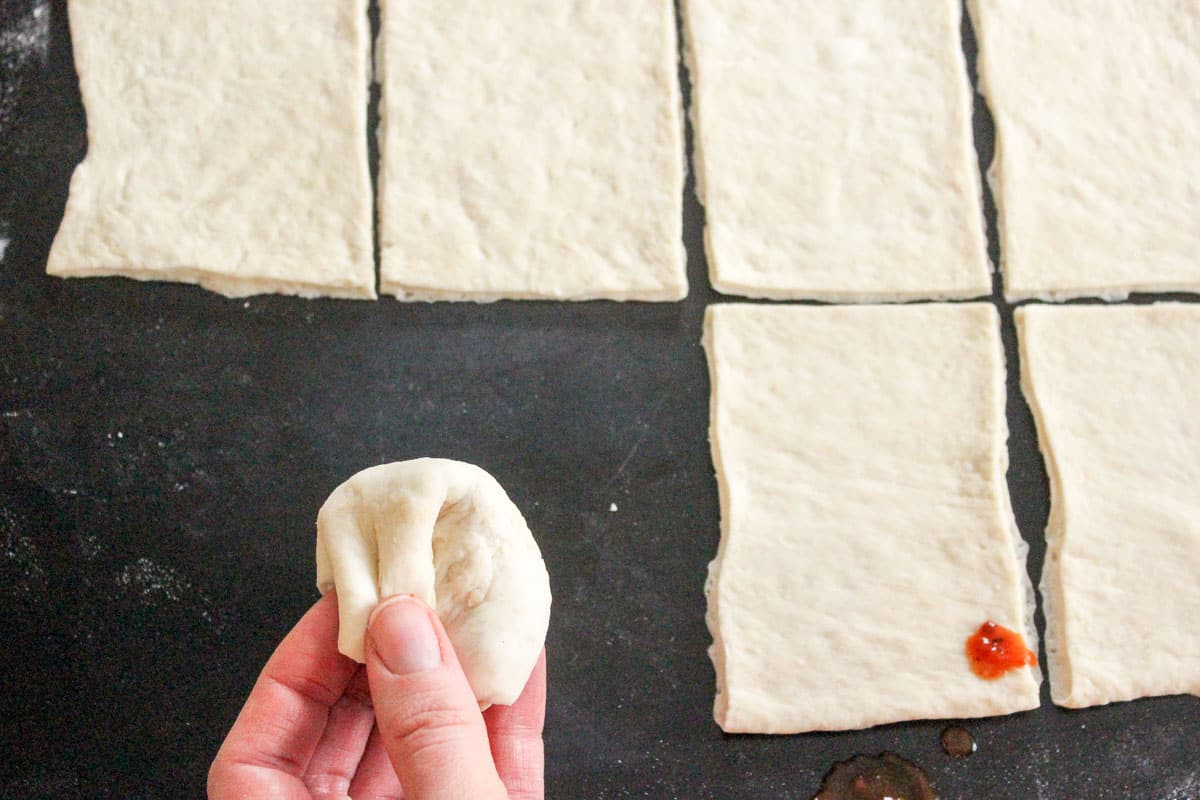
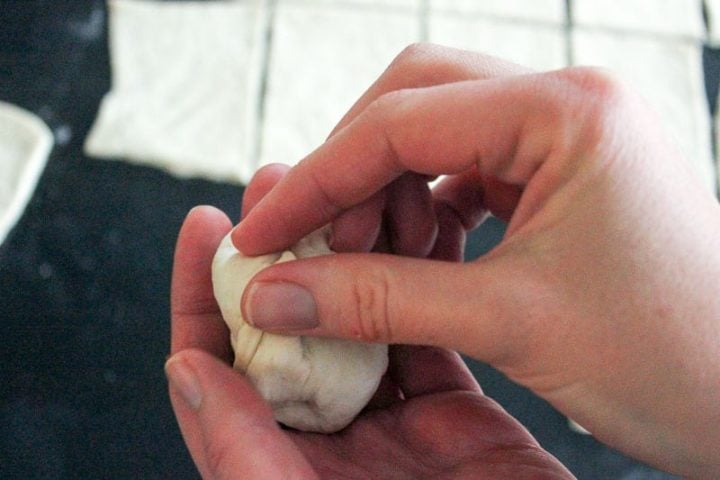
Fold the other two corners up so you are holding all the corners bunched in your fingers and the pizza pocket forms a ball.
Use your fingers to press all the seams together so the dough is sealed.
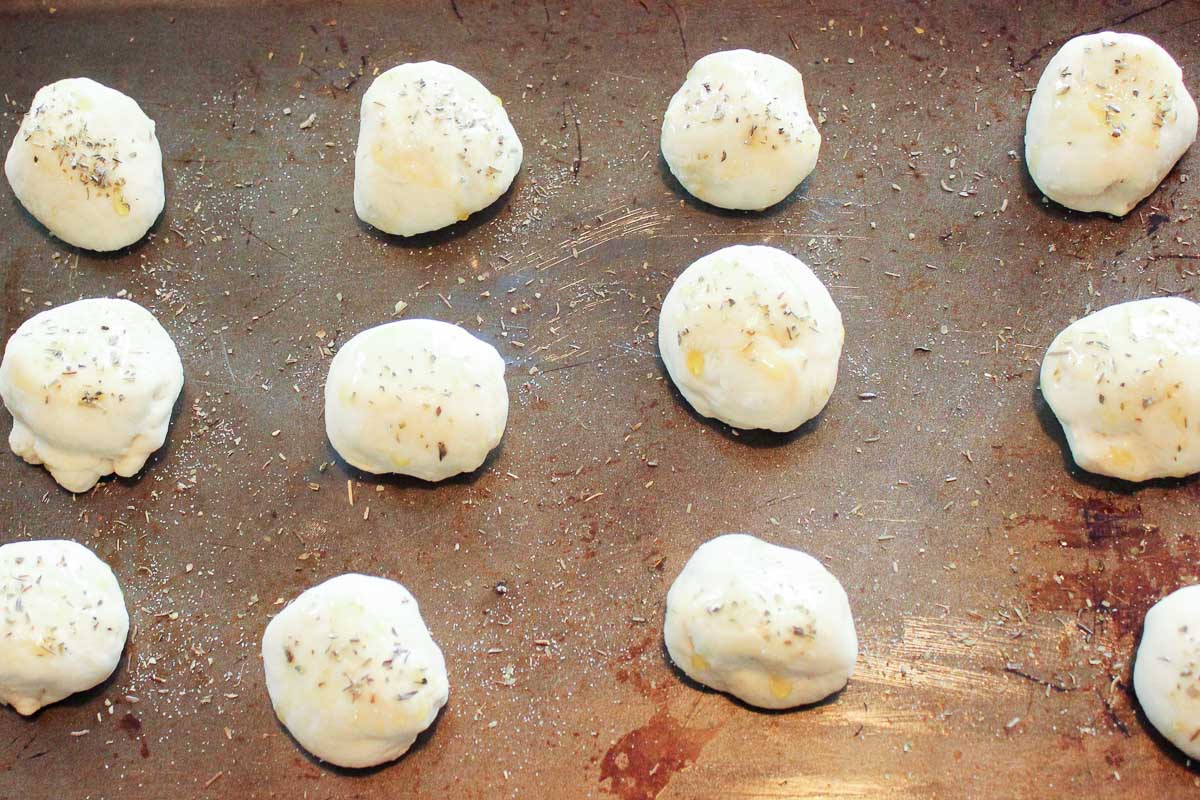

Bake in a 350 degree F oven for 15 – 20 minutes, or until dough is firm and bottoms are slightly browned.
Broil for 1-2 minutes if you’d like to brown the tops slightly. Some of them might leak a bit of filling but there should still be plenty inside.
Serving
Pile onto a plate while they’re fresh out of the oven and serve with pizza sauce for dipping (or another complimentary sauce if they’re not pizza flavored.
Be sure to let them sit for a minute or two because the filling will be quite hot!
They are also delicious at room temperature.
Enjoy! 🙂
Storing
Cool to room temperature and then refrigerate for up to 5 days, or freeze in freezer bags for 6 months.
Thawing & Reheating
Straight from the freezer you can defrost these in the microwave for about 2 minutes.
Reheat in the microwave for one minute OR a preheated, 350 degree oven for 5-10 minutes.
How to use leftover ingredients
If you find yourself with extra ingredients that you bought just for these pizza bites, here are a few ideas to help you use them up or store them in the freezer!
FAQs & Expert Tips for this recipe
The biggest cause of the dough not sticking together is that you can a bit of the filling on it, especially sauce. You only need a small amount of filling inside each pocket and you want to keep it well away from the edges.
If you’ve added too much flour to your dough you could also have this problem. Make a quick egg wash by whisking together an egg and a tablespoon of water, and brush this along the edges to help them stick together.
These make a great party dish as-is, but if you’re serving them for a meal, I find they are great with a simple green salad.
If you don’t like salads, you really can’t go wrong with French fries!
Make sure your dough is nice and warm (cold dough is tough and doesn’t cooperate).
Flour your work surface and rolling pin lightly so the dough doesn’t stick.
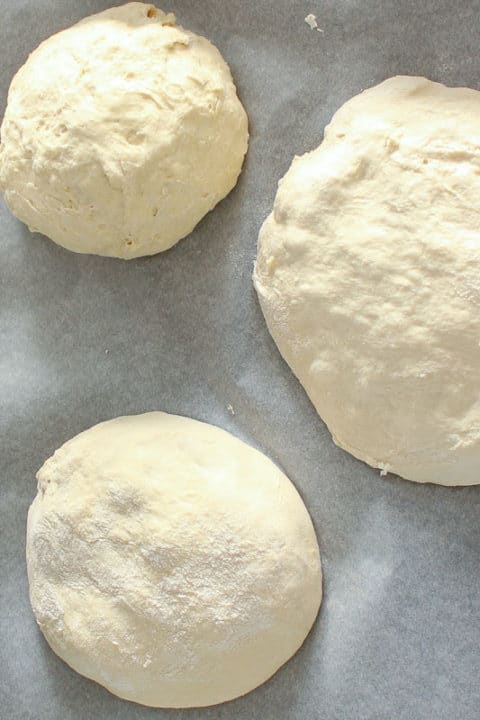
Use your hands to start to stretch out the dough into a bigger circle using gravity.
Then place the dough on the floured countertop and start to gently roll it out, starting from the center and moving toward the edges. If you notice your rolling pin sticking to the dough, sprinkle a bit of flour onto the dough to make it less tacky.
Be careful not to use too much flour though – you don’t want your dough to be dry, or hard to seal.
I roll the dough quite thin for these pizza pockets (see photo below).
You can substitute up to half the all-purpose flour in this recipe with whole wheat flour.
HOWEVER whole wheat flour has less gluten than white flour, which makes it harder to work with – not as soft, stretchy and fluffy. There will also be a slight change to the flavor, since whole wheat flour is less sweet than white flour.
If you’re using the same filling in all of your pizza pockets (ex: pizza sauce, pepperoni, peppers, onions and cheese), you can chop all of your ingredients very small and mix them together in a bowl. Then you just need to put a spoonful of the mixture into the center of each pizza bite.
You might also like:
Did you love this recipe? Leave us a ⭐⭐⭐⭐⭐ rating below! 😍

Easy Homemade Pizza Pockets
Ingredients
- 1 ball pizza dough (Note 1)
- 12 slices pepperoni cut into quarters (Note 2)
- 1-2 cups mozzarella cheese, shredded (Note 3)
- pizza sauce
- olive oil
- garlic powder
- Italian seasoning
Instructions
- Preheat oven to 350 degrees F.
- Roll out the dough into a fairly thin but large square or rectangle and use a sharp knife to cut it into squares. I was able to make 24 squares with one batch of our dough.
- Put your filling in the centre of a square. (Note 4)
- Fold two opposite corners up and pinch them together. (See photos above for demonstration.)
- Fold the other two corners up so you are holding all the corners bunched in your fingers and the pizza pocket forms a ball.
- Use your fingers to press all the seams together so the dough is sealed.
- Lay them seam-side down on a greased cookie sheet. Brush with olive oil and sprinkle with garlic powder and Italian seasoning. (Note 5)
- Bake for 15 minutes, or until dough is firm and bottoms are slightly browned. Broil for 1-2 minutes if you'd like to brown the tops slightly.
- Some of them might leak a bit of filling but there should still be plenty inside.Enoy! 🙂
Notes
- If you want to make homemade dough, check out our recipe for soft, fluffy dough: Simple Pizza Dough – Two Ways: Easy and Easier!
You can also opt to use store-bought dough to save time! - You can easily make these vegetarian or use other fillings (see suggestions below).
- Don’t use the pre-shredded cheese in the bags – it is coated with an anti-clumping agent that stops it from melting very well.
- Don’t overstuff it because you need a fair amount of dough around it to fold together AND the dough should not be moist from pizza sauce.
- If you would prefer your tops brown and shiny, whisk 1 egg with 1 tablespoon of water and brush the tops with it instead of the olive oil.
Other filling ideas:
– broccoli/mushrooms/onions/peppers/mozzarella (vegetarian) – 3 cheese (I like cheddar, feta and gruyere, but almost any cheese will work!) (vegetarian) – ham/pineapple/onion/mozzarella (Hawaiian) (blot pineapple dry) – sausage/onion/bacon/pepper/olive/mozzarella (deluxe pizza) – chicken/hot sauce/mozzarella (buffalo chicken)– alfredo sauce/ham/cheese/broccoli (YUM) – roast beef/horseradish/swiss (YUM) – taco meat/sour cream/ hot sauce/cheddar cheese (taco-inspired) – steak/peppers/garlic butter/provolone (steak sandwich)
Nutrition



Leave a Reply